Tuesday, September 29, 2015

recycling

I'm on a mission to use a pile of old clothes that I've been saving for a while, stuff I don't wear because they never quite fit right or something was torn and not fixable, or they remind me of someone or something I don't want to be reminded of, or because they were my "teacher clothes" and I'm not being scrutinized by a bunch of teenagers so I probably won't choose to wear button down shirts tucked into slacks for a while. It's pretty exciting, I have a lot of fun making stuff out of other stuff.

Here's what I ended up with so far.

Some blue linen pants that I bought at a thrift store years ago and I've repaired already several times, but they ripped in the pocket area and I couldn't fix it. Now, they are a shirt. I made the pattern up as I went, and somehow it worked out! I was able to do some creative cutting to get the back pockets on the sides of the shirt. I tried pintucks for the first time, then decided to put lace between them to add a bit of fancy. I like the medieval look, and it requires no closure, which makes on and off super easy!


Two more thrift store buys. I never liked the color of the shirt on me, but the fabric is great. The pants looked ok, but they never fit quite right. The fabric is also awkward for that style of pants. So, now they are a shirt too! The button placket down the back makes it!


A patagonia shirt, also a thrift store buy, that had this stain on it that always drove me crazy. So, now it is pants, and I never have to think of that pesky stain again! The awesome thing about making pants from shirts is that you don't have to hem the bottom if you cut the leg holes along the bottom of the shirt.


Here's a good one. This jacket was a gift from around when my 13 year old was born. I loved this jacket, but I hardly ever wore it because it fit weird. It didn't have any give in the sleeves, so when you raise your arms, the whole jacket raised up too. So I could only wear it when I knew I would be sitting still, which is never. And then all the buttons fell off when I did wear it, and I kept procrastinating getting a new set, until I finally decided it was time for the jacket to have a new life. I used linen for the waistband of these pants. They are adorable, and have quilted padding for all that climbing!


This is really one of my favorite things to do. I like the challenge, and the limitations inspire creativity. Tunics and dresses (sorry boys!) are probably the most fun things to play around with. I ran out of ideas with the other old clothes I have and a lot of them are summer-weight material, so I put them away for a while. When I feel inspired again (like when it gets down to 20 degrees) I've got a chunky wool sweater with holes in the elbows and I'm curious whether I can sew it with a sewing machine...


potty training part 2: pants

Well, I set out to make some perfect legging-type pants that would be easy for A to get on and off. She's starting potty training, and besides that she loves to put on her clothes by herself. I wanted them to be thicker than typical leggings for warmth, and stretchy so they give a little when she's trying to get them on and off, so after some trial and error I decided on cotton interlock, which is a super soft medium weight knit fabric. I wanted the pants to have a stretchy waistband, less restricting than elastic. The interlock doesn't have good recovery, it kind of stretches out after hours of wear (but unstretches when washed), so I decided to use ribbing for the waistband so the pants would be easy to pull up and down. I had some 100% cotton ribbing and some poly-blend ribbing to work with.

I made my own pants pattern based on my kid's measurements. I had a general idea of the shape of pants from patterns I've downloaded for free, like the one at MADE, and have drawn patterns off of store-bought pants, and sometimes they fit great and sometimes not. But, I am still trying to find a way to make a little money off of my sewing skills, so I want to have a clear conscience and know that the clothes I sell are made entirely from my own designs. I've designed roomier pants, and cloth diaper pants, but I still haven't made my own leggings design. I wanted these pants to fit pretty snugly, even when she loses the diaper, so if we need to we can layer them under other pants in the winter, but they need to have enough length that they're not going to be capris by the Spring.

The first pattern I drafted made some super tight leggings. I made the pattern using her measurements
without adding a seam allowance, thinking that leggings needed to be smaller so they stretch and fit like, well, leggings. It worked! They would have been perfect if I had cut them like leggings so they didn't have seams down the sides, and they had room for growing, and the crotch didn't sag because there's too much fabric there.


Then I made another pattern with bigger legs from the original leggings pattern. I basically used the same pattern as the leggings, but added about an inch on the outer leg side and a little on the inner leg, and made a dip in the front and a rise in the back. You can see the leggings pattern on top of the pants pattern in the first picture. It works great for non-stretchy fabric, but it isn't leggings. Here's some pants I made with this pattern, upcycled from an old quilted jacket and patagonia shirt. I folded down the top of the pattern 2.5" before cutting the fabric since I was planning to add a waistband instead of folding the top over and inserting elastic.


I like the pants and they are slim, but they need a little more length, are still a little bulkier in the crotch than I would like, and they would probably be a baggier with the soft stretchy interlock, and, well they're just not the leggings I was imagining. I remembered that I had experimented with some yoga-style pants at one point, and I ended up making the front part of the crotch much smaller than I thought I would need in order to make them fit up front so that the waistband isn't way up on her belly. And the back had to be quite a bit higher than the front to cover the bum. So, I took that yoga pants pattern that I drafted before, and imposed it on my leggings pattern (see photo), and adjusted the waist and crotch area. Then I added about an inch to the leg width from the original leggings all the way down, and after some trial and error, added about an inch to the leg length. On the right below is the final leggings pattern.


This pattern is perfect. The first picture with the green pants and blue waistband was the first try, and that's when I learned the waistband has to be quite a bit smaller so that it wouldn't stretch out and sag. For the other pants I used a 6" long waistband, so that when I fold it over and sew it on it adds a little more than 2.5" to the waist height. I cut the width of the waistband about 3" shorter than the waist measurement. For example, I cut a piece of ribbing 6" H x 13.5" W for my kid who has a 16.5" waist. After subtracting the seam allowance, it is actually only about 12.75" around. I like the ankle bands kind of long, so I cut them 5" H x 6.5" W. When they're folded over and sewn on, they add about 2.25" to the leg length. The orange stripy pants are about 3/4" longer than the plant pants, and you can see the room to grow in the picture. But aren't the plant pants absolutely perfect?? You can see in the picture where she's squatting that the waistband holds up pretty well!

I plan to add a tutorial soon for these pants, including how to draft the pattern yourself, after I get a little more practice under my belt. There are some things I've learned through this process. It is important that you have plenty of room in the butt. If it isn't high enough, it pulls down and forward, and the waistband pulls down over the diaper. Also, if you use fabric that only has 2-way stretch, you need to add even more height in the butt to prevent it from pulling the waistband down. Toddlers do a lot of squatting, which pulls the pants forward, so they need to have lots of room back there to move. Another thing, if you use 100% cotton for the waistband, you have to make it really snug. It stretches and doesn't recover well, so by the end of the day, or after lots of sitting and standing and jumping and squatting, the pants are falling down if they're too big, which is really annoying. I made one pair with a 14" waistband, and they were sagging after tots yoga class. I bought some cotton-poly blend 1x1 ribbing at Joann's in hopes it would retain its stretch better, and it did. The second thing is that more length in the legs is better than not enough! Most babies grow up more than out at this age, so the waist should fit a lot longer than the legs!

Stay tuned, after I find some people I can experiment on with sizing, I will do a tutorial, hopefully with better pictures than this post...

Have a great week!

Georgia

Monday, September 14, 2015

potty training part 1: undies

Oh, how I love potty training. It is about to consume my life. I am not in a hurry to deal with that, but if we don't do it soon it's going to be a battle of wills from hell. So, I'm starting by making undies and easy-up-and-down pants.

***Future apologies for the embarrassing underwear pictures to my adorable daughter. I am totally taking advantage of the fact that she has no idea I'm doing this. If I tried this my older kid, it wouldn't go over so well. :)***

First, the undies. I decided to use cotton interlock for the main part. A lighter jersey knit may be better, but I don't have any in my stash at the moment. I've been so used to making pants that fit over a diaper, I had to rethink the pattern. I decided to make the waist measurement slightly smaller than my kid's waist (16 1/2") so they would fit snugly, and I cut the waistband at 16" wide by 2" tall and I came up with this.


Well, it works ok, but she gets a little bit of a plumber's crack going on so we need a little more height in the back. They're also a little looser than I would like in the waist, and the wide crotch and snug leg hole ribbing kind of pull the whole thing down. I would show a picture, but I have to draw the line at crack exposure, so you'll just have to trust me.

Take two.

I took the pattern used above, made another pair of undies and left off the ribbing around the legs so I could cut the leg holes to fit better. I also added an extra inch to the back waist ribbing (after I removed the original band and recut it) so they would come up a little higher on the waist. It worked, though they weren't quite perfect. They needed more room for the belly in the front, and even more height in the back. I forgot to write down what I changed and life happened for a while, so I kind of had to start over.


Take three.

A week or two later, I had a chance to give it another go. I remembered I needed height in the back, but wanted to test the boy-shorty pattern again, so I just added another inch in the back. It looked like this. The top half is the front of the undies, and the bottom is the back. You can see how the front (top) is curved inward to go around the buddha belly, and the back (bottom) curves outward to go up in the back and cover the crack.


This is what they look like, and on the babe.


You can see here how the legs are pulling the undies down from the waist, and I think that could be uncomfortable, so I temporarily abandoned the boy short concept, and tried again.

Take four.

Finally. I made another pair, and as before put them on before I sewed the leg bands. I drew lines with a fabric marker on them while she was wearing them, and cut the leg holes to fit. I also decided to make the waist band three inches high instead of two (when folded, it adds 1.5 inches to the waistline). I also decreased the width of the waist band to 14" so they hug a little closer. Success!


Here you can see the boy shorty ones compared to the ones that fit. You can also see that I was too lazy to change my serger thread back to white. I had way too much width in the crotch, and too much length from waist to leg hole. I do want to tackle the boy shorts again but for now this pattern will do for potty training undies.


Here's the final pattern. I would have never guessed this shape would make underwear that fits, but it does! I didn't write it on there, but this is meant to be cut on the fold where the fold is lined up with the longest side. I increased the dip in the front waistband to about 1/2" (bottom) to allow more belly room, and you can see I kept the added one inch height in the back (top). I put some measurements on there to give a general idea of size. My little one has a 16 1/2" waist, so this could actually be even narrower for a snugger fit. For the waist band, I used a 14" wide by 3" tall piece of ribbing, and for the leg bands, I used 9" by 2" pieces of ribbing, allowing about a 3/8" seam allowance. I think these should fit boys too, but I haven't had baby boys, so I really wouldn't know! But, you could make the front straight across instead of putting the dip in the middle to give a little more room in the front.


It's really simple to put together, you just fold it in the crotch and match up the side seams right sides together, sew the side seams with a 3/8" seam allowance, then sew the bands on the waist and legs. If you've never sewn a band on, there's a good tutorial for using a sewing machine at Made By Rae or with a serger at Indiesew. They are both for necklines, but the same rules apply. Or, if you want to make it even easier, sew the leg bands on before you sew the side seams. The leg holes will just barely fit around my serger's free arm (I had to go look up in the manual what that thing is called), so I did the leg bands after to eliminate the seam in the band showing. For the bands,I used a cotton poly rib from Joann's remnants basket that was kind of thick, but very stretchy and recovers well. I'm going to experiment with using other fabrics for the bands that are less bulky so she can wear them under leggings in the winter. I don't think cotton jersey or interlock will have enough recovery to survive the ups and downs (haha...), so I'm thinking a lighter weight poly blend or a baby rib. I thought briefly about leaving the leg bands off, but wedgies would be inevitable.

**Update** I added another inch to the sides and back for more room, but left the depth of the dip in the front the same, and the size of the cuffs and waistband the same. These fit even better. I also added two layers of birdseye and one layer of flannel to some to make training pants, like this:


As you can see, I had a hard time lining it up just right in the front, but it works! You could also sew a layer of PUL to make them more leak proof. These catch leaks, but won't hold a full-on pee.


Sunday, September 13, 2015

super earth friendly clothes

I just discovered this great girls and women's slow clothing company, Gaia Conceptions, today while I was surfing around the web looking for sources of organic cotton knits. They are amazing, and inspiring, though unfortunately out of my price range!

All of their fabrics are organic, sourced from the U.S. or fair trade manufacturers abroad. They use organic cotton and hemp, some blended with a little lycra, and there are two options for eco-friendly dyes. Everything is made to order, eliminating waste. Here's a couple of their offerings. I love the gauchos. So much.

Image 1Chunky Cowl Cropped Shirt

Monday, September 7, 2015

mass-produced gender stereotypes


I’ve been noticing a lot of hype lately about gender stereotypes on children’s clothing, like this Huffington Post article, and there have been several kickstarter campaigns to start businesses that sell clothes for girls that have bugs and dinosaurs and all the really fun stuff instead of just tiaras and big-eyed kittens. I think that’s cool, and at the end of this post I highlight some of them. But first, I have to share my rant on the insanity that retailers like to call “graphic tees.”

Since when does your kid need to tell the world how awesome he is with his shirt? When your kid is throwing a tantrum in the grocery store, are people (or you?) going to look at his shirt and think “Oh, he’s a future number one draft pick. I don’t mind him screaming at the top of his lungs.” Does it make a mother feel better, when she's woken up for the 6th time in one night, to read "I love my mommy" on her kid's shirt? If I ruled the world, I would not allow words to be printed on small children’s clothing. It isn’t fair. That kid has no control over the message they are sending. If they can’t read the words on their shirts, they shouldn’t be there.

Speaking of such things, I have to share my recent research on the topic of words on baby clothes. I’ve always been aware of the obnoxious pink and purple obsession in little girls’ clothes, which is partly what spurred me to start making my baby’s clothes. On a side note, I’ve discovered that I actually like pink and purple, when used tastefully, and I’ve had two girls and both of them love(d) pink at a very early age, without my encouragement. There is a reason the girls section looks like pepto bismol puke…some girls like it, and people buy it. But, back to the point, I had also noticed over the years that the words on boys and girls clothes were different. Girls’ shirts tended to say “cute” while boys’ shirts say “strong.” But I didn’t realize how bad it really was. The Gap is the exception. They seem to have made an effort to keep the words printed on their baby shirts neutral, like “New York” or “hang in there.” But I was blown away by Carter’s and Gymboree.

Princess Pug TeeThe first thing I noticed when I looked more closely was that there were significantly fewer words on girls shirts than boys. So, I bet you can guess some of the girl’s shirt words…”call me princess,” “so amazing,” “incredible,” “super awesome,” most of them had pictures of cats, suns, oceans, or pugs on them. The boys on the other hand, wow. Brace yourself. Here’s a sampling…”be brave, adventure awaits,” “superhero sidekick,” “king of the forest,” “great outdoor explorer,” future genius,” “all-star champion,” “ride on, dude,” “let’s roll and explore,” “bluewater cove lookout crew,” “extraordinary Redbrook troop ranger, junior heroics,  patrol camp 96 Yellowstone,” “wave rider,” “built for speed,” etc. You get the idea.
Glow-In-The-Dark Astronaut Thermal

This is what stands out to me: Boys, even though they are babies and can’t throw a ball or explore the forest, are praised for their ability to DO things. Girls, though they have no concept of how sweet their lives are and they don’t want to be princesses, are praised for doing nothing, just vaguely being awesome. So what should we praise girls for doing (assuming we simply must have words on babies shirts)? Of course, future genius applies to both genders, as does superhero sidekick or exploring, riding motocross, being a forest ranger…well, any of those things actually. The only exceptions are being a baseball all-star or future number one draft pick. But, do we really know what our kids are going to grow up to be? He could become an interior designer or a fish farmer for all you know, why do we need to label our babies as professional athletes before they can even grab a rattle?

I know that what’s on a baby’s shirt probably doesn’t really matter in the scheme of things, but why? Why do these things exist? If you have the ability to mass produce printed shirts and sell them, why would you ever think that a baby would wear a shirt that says “bluewater cove lookout crew” or “pretty princess”? It just doesn’t make sense. In a million years of brainstorming ideas for baby shirts, I would never come up with any of those things.

((Update: I think these companies are getting the hint. I checked again since they've released their fall lines, and there is improvement as far as the words go, but you still only see the cool stuff like dinosaurs on boy's shirts.))


There are alternatives, for those who don’t want to weed through the princess shirts at the mall. First of all, I want to give props to the locals I’m aware of. Sassy Knitwear makes clothes for kids and women here in the Twin Cities, and you won’t find any cheesy words on their clothes.  The Patchery lets kids design their own clothes using a variety of fabrics and are also made in Minneapolis. Neither are vocally fighting gender stereoypes, but both are very focused on sustainability and have girl’s and boy's clothes that are play friendly, and without words.

Pi Play Dress. 100% cotton. Made in the USA.
Princess Awesome
Then there are several U.S. clothing companies popping up whose missions are to combat gender stereotypes. Princess Awesome is indeed awesome, they make dresses with dinosaurs and science stuff and pi, and no words. I’m a huge fan. They are manufacturing in a small factory in Chicago. They don’t have a huge inventory, but they’re working on it! They’re a little pricey, but I could see those dresses getting a lot of use.

take-flight.jpg
Girls Will Be
I still hold to my no words on shirts preference, but I love the non-worded shirts at Girls Will Be. They provide some great options for girls that don’t want to be too girly. The shirts’ art features bugs, robots, camping, math, all good stuff, all the stuff I hope my girls like. Their shirts and shorts are made in L.A., and their hoodies are made in a company in Honduras that is part of the Fair Labor Association. I appreciate their transparency, they share their whole story and process, along with sourcing, on their website.

I like the simplicity of BuddingSTEM, a line of shirts, pants, and bags with dinosaurs, rockets, and trains for girls. I couldn’t find any information about their sourcing and haven't heard back from an email inquiry. According to their website, some of their clothes are made in the U.S. and some are imported and printed in the U.S.

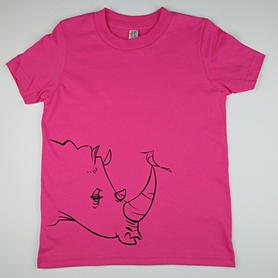
Other U.S. tee shirt makers that are fighting gender stereotypes are Quirkie kids, who make pink shirts with cool cartoon drawings of animals; Handsome in Pink, who make tee shirts that openly defy gender norms by putting graphics of tool belts on pink onesies and putting the phrase "forget princess, call me president" on onesies and tee shirts; Jessy and Jack, who make shirts with robots and brightly colored animals with waterbased inks; and Svaha, who makes shirts with science themes, dinosaurs, trucks, planes, etc.. Svaha claims their shirts are ethically sourced and sweatshop free, made in the U.S. and abroad.   Handsome in Pink and Jessy and Jack use American Apparel tee shirts and onesies. It is a bit ironic to use a manufacturer that is shrouded by sexual discrimination and assault charges for a gender-equity focused clothing company, but hey, at least American Apparel’s workers are paid and safe. Princess Free Zone has gender-neutral tee shirts for girls also, and they are made and dyed in the U.S., but I am not certain where.

Handsome in Pink
PFZ-Buzz Off
Princess Free Zone
Logo (Elephant and Robot) Onesie, Lemon
Jessy and Jack
Quirkie Kids

Almost all of these companies have something in common. They were started by moms whose daughters didn’t want to wear princesses and sparkles, and couldn’t find clothes they liked at the stores. More power to them. I hope we see more of this, and I hope it catches on with the retailers. Really it is sad that it hasn’t already, and that there are people who actually think it is wrong to mix girls and boys toys in the Target toy aisle. After I saw this the other day at Target, I don’t think you need signs to tell you where the girl’s stuff is…